Set up a web server
Let's prepare our local environment in order to create our first WebAR experience.
We're going to use the Free Edition of MARTINS.js in this guide. The Free Edition is suitable for personal study, educational purposes and open-source projects. More information in this link.
Create a file structure
Let's create a file structure for our AR experience:
- Create a new folder called
ar-demoin your filesystem - Download the latest release of MARTINS.js and extract
dist/martins.jstoar-demo/ - Create a new empty file called
index.htmland store it inar-demo/
You will have the following file structure:
ar-demo/
├── index.html
└── martins.js
Add boilerplate code
Use the code editor of your choice to write the following content to index.html:
<!doctype html>
<html>
    <head>
        <meta charset="utf-8">
        <meta name="viewport" content="width=device-width,initial-scale=1">
        <title>MARTINS.js WebAR demo</title>
        <script src="martins.js"></script>
        <style>body { background-color: #3d5afe; }</style>
    </head>
    <body>
    </body>
</html>
Set up a local web server
Let's set up a local web server in your machine for development purposes. I'll be showing you an easy-to-follow approach. Feel free to use a different approach if you're an experienced web developer.
This is an easy solution that works on Windows, Linux and macOS:
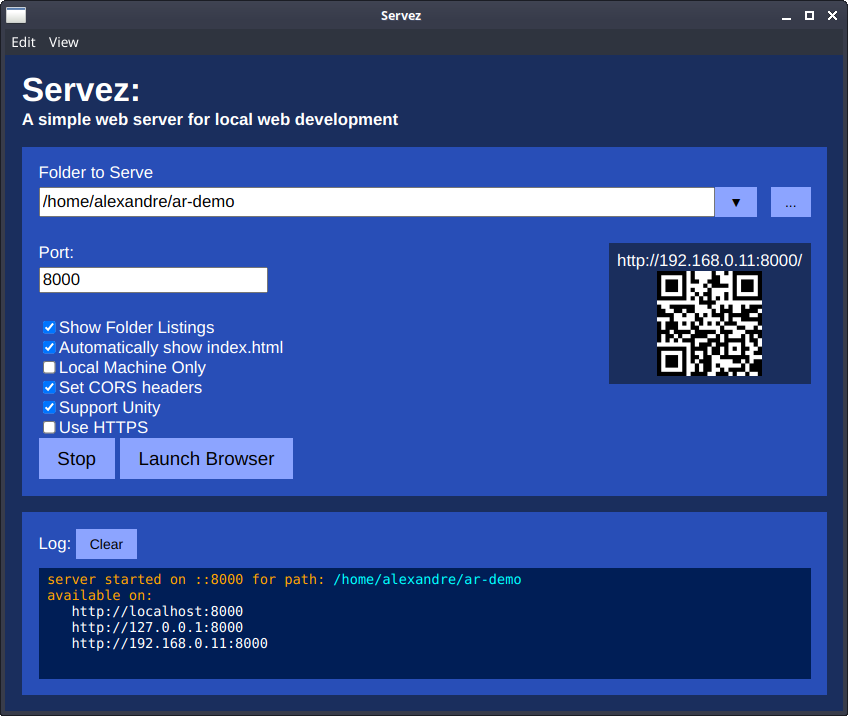
- Download and run Servez, a simple web server for local web development.
- In Folder to Serve, specify the
ar-demofolder we have just created. - Change the Port to 8000.
- Click on Start to launch the local web server.
- Click on Launch Browser to open a web browser at http://localhost:8000.
If you're familiar with the command line, you can use programs such as python, node or php to launch a local web server. Navigate to the ar-demo directory and then run:
Next, open your web browser and go to http://localhost:8000.
You should see a blue screen in your web browser:

If you see that blue screen, you're ready to proceed. If not, review your settings.
Why port 8000?
Port 8000 is commonly used in web development. Although you may use a different port, I suggest that you stick to this convention throughout this guide.